Installing A New Kitchen Sink
Introduction
Sinks are made specifically for fitting in one of the following three ways;
- Inset sinks are mounted into a hole in the worktop such that the rim of the sink overlaps the worktop and supports the weight.
- Sit on sinks (also called overmounted sinks) are positioned directly on top of the base units, replacing the worktop that would run over this area. The adjacent worktop simply butts up to the sides of the sink. These sinks do tend to look a little industrial!
- Undermounted sinks are installed such that their top lip is sealed against the underside of the worktop. This creates a sleek and uncluttered look, but this cannot be done with laminate worktops as the sink hole reveals the unfinished particleboard centre of the surface.

Tools for the job
To fit a kitchen sink, you will need the following;
- Jigsaw (with downstroke wood blade)
- Pencil
- Tap(s)
- Centre Punch
- Hammer
- Drill
- Adjustable Wrench
- Silicone Sealant
- Copper Pipe
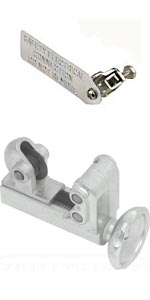
- Pipe Cutter
- Overflow Unit
- Waste Trap & Pipe
- Earth Bonding Kit - Inc. Earth Clamps

- Ideally the new sink will be installed into a new length of kitchen worktop, unless you are installing an identical replacement sink, or are able to enlarge the current sink hole to accomodate the new one.
Removing the old sink
Before attempting to remove the existing sink, turn off the mains water supply and if possible isolate the inlet supply to the sink.
If you are planning on installing a brand new kitchen then a huge amount of care is not entirely necessary as the majority of plumbing will be replaced, however if you are planning on simply replacing the sink only then do the following:
- Loosen all compression joints to the taps, and disconnect the waste trap from the base of the sink.
- If you are planning on keeping the existing plumbing points then leave at this, however if new plumbing is required, cut through the waste and supply pipes at a place that makes connecting new plumbing an easier task (ie not immediately below the sink).
- Remove any fixings holding the sink in place, either against the wall or within a worktop, and lift the sink free.
Fitting the new sink to the worktop
- Cut a hole in the worktop for the sink, by either tracing around the template supplied with the sink, or by turning the sink upside down in the desired position on the worktop and drawing around the edge with a pencil. Mark a line 10mm (⅜in) inside the original line to create a supporting ‘lip’ for the sink to sit on, then drill a 10mm (⅜in) hole reasonably close to the inside line and then use the jigsaw to cut out the remaining shape, creating rounded corners to avoid splits.
- Sit the sink in its hole and mark the position of the taps and the waste pipes onto the wall. Remove the sink and extend supply and waste pipes to these marked areas as necessary.
- If applicable, cut tap hole(s) into the sink. Cover the desired tap position with masking tape and make a small hole in the centre with a centre punch. Use increasingly large drill bits (masonry bits for ceramic sinks, metal bits for stainless steel) on this hole to widen the gap to the desired diameter for the taps.
- Assemble the taps and waste outlet onto the sink before it is positioned into the worktop. Fit short copper tail pipes to each tap to make later installation and connection to supply easier.
- To create a watertight seal, turn an inset sink upside down and run a line of silicone sealant around it's perimeter. This sealant should be on top of the lip for undermounted sinks, and the sides of the sink for a sit on sink.
- Place the sink in position in the worktop and fix it in place with the supplied brackets and screws.
Connecting the taps and waste trap
- Current Water Regulations stipulate that a waste pipe must pass through the grid covering a waste gully, but stop short of the water sitting in the gully trap.
- Run a 40mm (1.5in) waste pipe through the outside wall to the gully, and connect to the waste pipe fixture mounted to the underside of the sink.
- Connect up the supply pipes to the taps, now is a good opportunity to add isolating valves to these pipes to make future servicing easier.
- Ensure the sink is earth bonded according to current IEE Wiring Regulations. Since water is a good electrical conductor, any electrical leakage (from a faulty circuit) will use any moisture to travel to earth. To prevent electrocution, all metal parts must be connected together with an earth wire (min 4mm) via an earth clamp which will collect current/voltage from the leak and equalise it around the metal parts. The other end of the earth wire should be connected to a local earth such as a close socket.
Further information and useful links
- Choosing a new kitchen sink
- Common metal compression fittings & adaptors
- More plumbing & heating topics
- More kitchens topics
- Find a Plumbing Merchants near you
- Find a Plumber near you
- Find a Kitchen Fixtures & Fittings supplier near you
- Water Regulations Guide - (wras.co.uk)
- The Institution of Engineering and Technology for IEE regulations - (theiet.org)
Site Pages
Featured Articles


